How to Pay for Multiple Invoices Online
The next time you need to submit payment towards one (or more) PS-Invoices, select the Checkbox next to the ones you want to pay and note the appearance of the Pay Multiple button.
You can select up to 10 PS-Invoices to pay at a time. 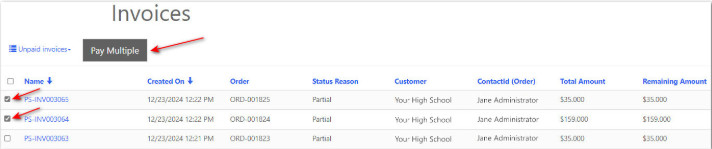
Note – You can only utilize the Pay Multiple feature if you have a previously Saved Payment Method on your account.
In the Pay Multiple Invoices dialog box that opens, click the Select a Saved Payment Method button to select your saved Payment Method. 
Click the Confirm Payment Button to re-use your previous Payment Method and submit payment for the PS-Invoices that were selected. 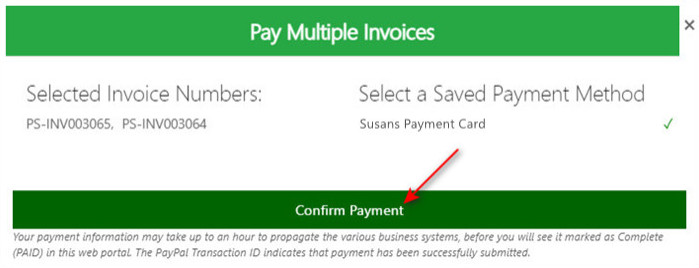
A result message will be displayed, for each PS-Invoice selected, indicating whether payment submission was successful (or not) using the Saved Payment Method. The green banner at the bottom will change to a lighter shade of green and indicate that the process is complete with the message Payment Complete. 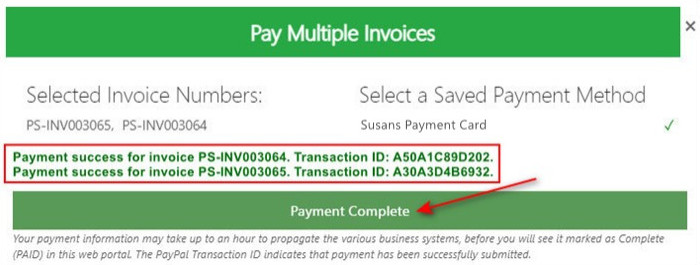
PS-Invoice Payment Process
The PS-Invoices that were successfully paid will then be changed from the Unpaid to the Processing status. They will be removed from the Unpaid Invoices Listing and reside under the Processing Invoices Listing. Your payment information may take up to an hour, to completely propagate the various business systems, before you will see it marked as Complete (PAID). Once that occurs the PS-Invoices will be moved from the Processing Invoices Listing to the Paid Invoices Listing.
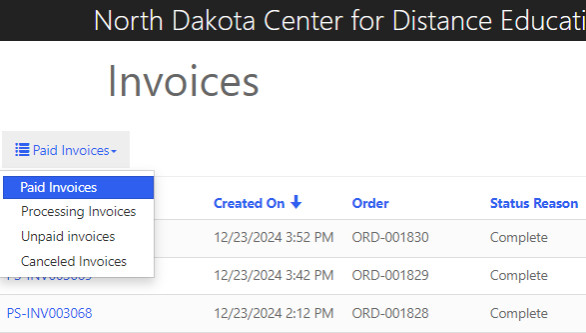
You can view those listings by selecting the desired state from the drop-down menu.